- Load levels from Ruined Level Portal files (*.rlp)
- Switch to portal editor mode - I edit individual portals at a time
- Select just about any object in the level, and edit its properties with the Property-grid control and my "gizmo" control
- Load new models and collision meshes while the game is running
- Save portals into *rlp format
To make loading, and saving levels possible, I had a couple of options.
- Use reflection to process and load the level data to and from XML files
- Use reflection to process and load the level data to and from "binary" files
- Write my own format, importer and processor
I went with option number 3, for a couple of reasons:
- I could make my format as size efficient as possible ( I'm using bits, bytes, and uint16's)
- I could store just enough data ,as opposed to too much junk
- I could store what I wanted and know where to find it in the file
- XNA makes writing importers and processors REALLY easy
- I just like the flexibility
Now my format may not have the readability of XML, but it is sure a LOT more readable than XNA's binary-serializer. If someone needed to, they could parse through the level files by hand and make changes - with the right documentation of course.
Here's a little bit of the level parser to give you an idea of what I mean:
ushort Type = input.ReadUInt16();
if (Type == 0x0000) // Torch
     portal.DynamicObjects.Add(new Engine.DynamicObjects.Torch(input.ReadVector3(), input.ReadSingle(), portal, input.ReadBoolean()));
else if (Type == 1)
{
     // Door
}
else if (Type == 0x0002) // Ladder
     portal.DynamicObjects.Add(new Engine.DynamicObjects.Ladder(input.ReadVector3(), input.ReadSingle(), input.ReadSingle()));
else if (Type == 0x0003) // Chest
     portal.DynamicObjects.Add(new Engine.DynamicObjects.Chest(input.ReadVector3(), input.ReadSingle(), Index, input.ReadUInt16(), input.ReadUInt16()));
So as you can see, I'm only reading the data used to initialize the torch, I don't need to store all the other fluff XNA's-serializers store - and I'm not talking about the stuff you can mark to ignore.
For example: things like strings can be stored as a char[] instead of 2 bytes per letter, or if i had an object that contains both a model and a collision mesh, I can have an unique type saying, "Hey, this object's model and collision mesh are the same, I don't have to store the file name twice."
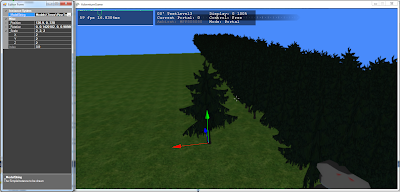
Enough talk for now though, here are some pictures of the level editor in action-
 |
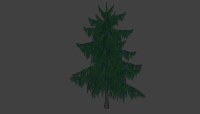
| I can even edit instanced-objects individually! |


