Pages

Thursday, May 10, 2012

Nav-Mesh Editor Part-3

Okay, making more progress on nav-meshes!
New features:
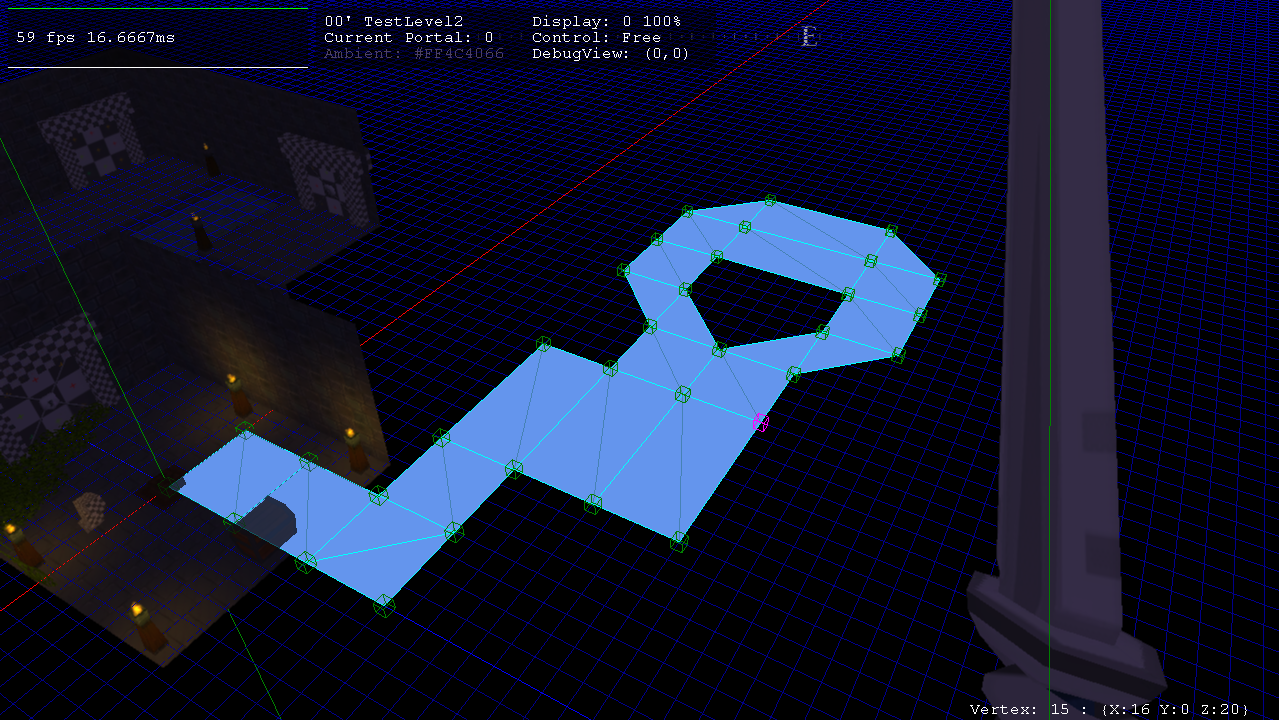
  • Polygon Select Mode
  • Automatic neighbor calculating
  • Path finding preview
  • Nav-Mesh file format ( *.rnm)
I made some more additions to the editor, mostly to make creating these meshes easier. I had to do all the work associated with making a model editor, except my "polygons" can have up to 15 sides ( expandable to 18). All of the navigation data is stored in the one of  the most memory-efficient way possible IMO.

I also got around to making a file-format to store the navigation-meshes in! I call it "Ruined Navigation Mesh" format - original and ironic I know. These files are also VERY size efficient.
For all of you out there familiar with XNA, I've written my own importer and processor...

Ruined-Navigation-Mesh-Format:

Offset
Description
Size
0x00
Header "rNavMesh"
8 bytes
0x08
Number of Vertices (v)
2 bytes (ushort)
0x0A
Number of Polygons (p)
2 bytes (ushort)
0x0C
Vertices
12 bytes (float3) * p
0x0C * v * 12
Polygons -
xp vertices ( ushort[] )
yp neighbors ( ushort[] )
Sp = Sp-1 + 4 + xp + yp

Data stored in memory as a single ushort[]

One of the great things about just reading data directly from the file is that XNA can compress *.rnm files automatically!

So in other words, all that's left to do with this is to actually make the meshes, and program some AI to use them :P

Path-finding, Initial Polygons 
Path-finding, Found Path 


Note : Polygons are stored as a single ushort[] in memory, the actual polygon's data is extracted from this array (Yay! bit-wize Shifts)

Sunday, April 29, 2012

Nav-Mesh Editor Part-2

So, as usual I have very little time to work; the time I am getting though, I am using to make sure I can better use my time.
Hence why I've spent more time on the nav-mesh editor.

Additions:

  • A translation tool (similar to most 3d editors).
  • Polygon highlighting.
  • Usability tweaks.

Anyways here are some pics to show what I'm talking about:

The navigation-mesh mesh editor.


Sunday, April 22, 2012

Nav-Mesh Editor

So as I mentioned in the previous post, making navigation meshes on pieces of paper is a pain. So I've created an editor that runs right within the game.
Don't worry, this won't show up while you're playing :)

Anyways, I can now make the nav-meshes much more easily, which should help speed up level creation!

What works:
  • Multi-selection of vertices
  • Keyboard based tranforms
  • Adding new vertices
  • The display of vertices (boxes)
  • The mesh visual, cyan outline of polygons

What's still missing:
  • Selecting polygons
  • Creating new polygons

So hopefully, when those last few features are added, I can create and test out a level that implements the navigation system...


Friday, April 13, 2012

Navigation

So, I've reached the awfully wonderful part of a game's development, where you have weapons programmed and tested, but now, you are just dying to get something to hit in your game.
This means AI is coming up fast!

Okay, so almost any game with an AI system needs to implement some sort of navigation system.

And that's what I've been working on for the past few days.
I have created a Navigation Mesh system for Ruined, that's powered by the A* ( A-Star ) navigation algorithm


You can read up on what exactly a Navigation Mesh is at any of these links:
Then you can learn about A* and its implantation at any of these:

Anyways, the gist of this all is that the monsters and enemies in Ruined should be smart enough to find you and KILL you, no matter where you hide :P

The test navigation mesh, with a test path. Red = path

The test mesh was created by hand, on a piece of graph paper.
The test path is from cells A to P.
So, I still need to devise a way to actually make these Navigation Meshes, because doing them all on paper would be RIDICULOUS, but for the most part, I've managed to get one step closer to finishing the game!

Sunday, April 8, 2012

Sword Detection Progress

Making some awesome progress! I've gotten to the point where objects can be programmed to react when a weapon hits them. So things like monsters should be quite simple to make now. The "Hit-able" objects are represented with a bunch of spheres, inside of one big sphere. When the player swings a weapon, the engine does a ray-test to determine if the weapon hits the big sphere, and if so, checks to see if it hits one of the smaller spheres that make up a model.

In other words, you actually have to "hit" an object for the game to think you've hit something!

A smaller sphere in a test-torch

Hitting the torch, lights it!

A view of some of the collision bounds. Red = obstacle, Blue = big sphere check, Green = small sphere check

A better view of some "big-spheres"

Friday, April 6, 2012

Sword Detection

Okay, so the sword system is all good to go! I've made the other two sword swing animations and they work AMAZINGLY.
I even managed to get the sword detection down. The detection actually uses the position of the sword.  Currently the sword only collides with the level geometry because there is nothing to attack; hopefully I'll fix that soon, though.

Green line is the current sword collision line, red line is the last sword position.

Green is current sword position, yellow is previous position and red is a previous hit.

Thursday, April 5, 2012

Sword Swinging

Finally! After four months I have an actual weapon being drawn in the game.
I have done one of the three types of sword "attack", I'll make the others shortly, I'll get a texture made while I'm at it!