Pages

Showing posts with label Progress. Show all posts

Saturday, August 4, 2012

Textures

So I'm discovering that making textures takes a LONG time. this is especially true if you are just using a mouse to do all of your drawing.
Previously I was able to, if undisturbed, to make at MOST 2 textures a day.
It's worth mentioning that all of the textures I make are quite large; most are 1024 x 1024 - I can always, easily make them smaller.
A week ago I decided that I was tired of drawing with a mouse, so I decided that I was going to get a graphics tablet. After much browsing online I finally found one I liked:
The Wacom Bamboo Capture looked like the perfect mix of functionality and price - I promptly picked one up from my local big-box electronics store.

I must say that using a tablet is not only more intuitive than using a mouse, but it's also quite faster.
The software I use to author my textures - GIMP - conveniently supports tablets, and the 3d modeler I use  - Blender - surprisingly does as well.

All in all I must say that a graphics tablet was a wise investment, I can now easily pump out up-to 6 completely new textures a day. That's three times faster than with a mouse, and I must also say that my images also look better as a result.

Some of the textures I've made in GIMP, rendered in Blender.
Can you tell what game I'm using for inspiration?

Monday, July 23, 2012

Finally a level editor!

Well it took a bit of time, but it's finally in working order! To elaborate a bit further, here's a list of things that are now possible in the Portal debug mode:

  • Load levels from Ruined Level Portal files (*.rlp)
  • Switch to portal editor mode - I edit individual portals at a time
  • Select just about any object in the level, and edit its properties with the Property-grid control and my "gizmo" control
  •  Load new models and collision meshes while the game is running
  • Save portals into *rlp format

To make loading, and saving levels possible, I had a couple of options.

  1. Use reflection to process and load the level data to and from XML files
  2. Use reflection to process and load the level data to and from "binary" files
  3. Write my own format, importer and processor
I went with option number 3, for a couple of reasons:
  • I could make my format as size efficient as possible ( I'm using bits, bytes, and uint16's)
  • I could store just enough data ,as opposed to too much junk
  • I could store what I wanted and know where to find it in the file
  • XNA makes writing importers and processors REALLY easy
  • I just like the flexibility
Now my format may not have the readability of XML, but it is sure a LOT more readable than XNA's binary-serializer. If someone needed to, they could parse through the level files by hand and make changes - with the right documentation of course.
Here's a little bit of the level parser to give you an idea of what I mean:
ushort Type = input.ReadUInt16();
if (Type == 0x0000) // Torch
     portal.DynamicObjects.Add(new Engine.DynamicObjects.Torch(input.ReadVector3(), input.ReadSingle(), portal, input.ReadBoolean()));
else if (Type == 1)
{
     // Door
}
else if (Type == 0x0002) // Ladder
     portal.DynamicObjects.Add(new Engine.DynamicObjects.Ladder(input.ReadVector3(), input.ReadSingle(), input.ReadSingle()));
else if (Type == 0x0003) // Chest
     portal.DynamicObjects.Add(new Engine.DynamicObjects.Chest(input.ReadVector3(), input.ReadSingle(), Index, input.ReadUInt16(), input.ReadUInt16()));

So as you can see, I'm only reading the data used to initialize the torch, I don't need to store all the other fluff XNA's-serializers store - and I'm not talking about the stuff you can mark to ignore.
For example: things like strings can be stored as a char[] instead of 2 bytes per letter, or if i had an object that contains both a model and a collision mesh, I can have an unique type saying, "Hey, this object's model and collision mesh are the same, I don't have to store the file name twice."

Enough talk for now though, here are some pictures of the level editor in action-
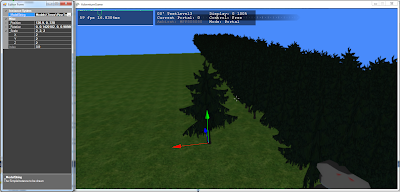


I can even edit instanced-objects individually!


Friday, July 6, 2012

Night Sky

Well, this post will be a quick one.
As the title implies, I have a working night sky, complete with stars clouds and a moon!


Oooooh! The Red moon.

Tuesday, June 26, 2012

Sky

So, considering the last post, Terrain, one of the other constantly visible things in a game is the sky. Whether  you're just getting a glimpse of it as you fight off some monsters or flying through it, the sky can be equally important as any other part visual part of a game. so of course I've gone ahead and started work on the sky system for Ruined. I wanted to follow the art style of the game, so I stuck with a stylized design.
The sky is still "under construction," but I feel like a good portion of it is working


The clouds follow the stylized theme of the game,
and move dynamically over time


Friday, June 22, 2012

Terrain

One of the most important things in a game can easily be its terrain. The scale, the detail and the atmosphere it creates easily make a good terrain system a must.

So of course I've begun work on a terrain system, nothing fancy yet, I've only invested 2 days in it so far, but I'm pretty pleased with the results.

I've created a terrain editor, built right into the engine.
Features include:

  • Loading/Saving of a height-map
  • Physics, dynamic lighting... - all the features of the engine
  • Texture splatting
  • Raise, lower and smooth tools
  • The ability to paint terrain from right in the game!
I still need to look at some optimization techniques so I can be sure it runs flawlessly on the Xbox, but for now here's some screen-shots of the editor.

The terrain editor doing its thing.
Green = Raise; Red = Lower; Blue = Smooth; White = Texture Paint

Thursday, May 10, 2012

Nav-Mesh Editor Part-3

Okay, making more progress on nav-meshes!
New features:
  • Polygon Select Mode
  • Automatic neighbor calculating
  • Path finding preview
  • Nav-Mesh file format ( *.rnm)
I made some more additions to the editor, mostly to make creating these meshes easier. I had to do all the work associated with making a model editor, except my "polygons" can have up to 15 sides ( expandable to 18). All of the navigation data is stored in the one of  the most memory-efficient way possible IMO.

I also got around to making a file-format to store the navigation-meshes in! I call it "Ruined Navigation Mesh" format - original and ironic I know. These files are also VERY size efficient.
For all of you out there familiar with XNA, I've written my own importer and processor...

Ruined-Navigation-Mesh-Format:

Offset
Description
Size
0x00
Header "rNavMesh"
8 bytes
0x08
Number of Vertices (v)
2 bytes (ushort)
0x0A
Number of Polygons (p)
2 bytes (ushort)
0x0C
Vertices
12 bytes (float3) * p
0x0C * v * 12
Polygons -
xp vertices ( ushort[] )
yp neighbors ( ushort[] )
Sp = Sp-1 + 4 + xp + yp

Data stored in memory as a single ushort[]

One of the great things about just reading data directly from the file is that XNA can compress *.rnm files automatically!

So in other words, all that's left to do with this is to actually make the meshes, and program some AI to use them :P

Path-finding, Initial Polygons 
Path-finding, Found Path 


Note : Polygons are stored as a single ushort[] in memory, the actual polygon's data is extracted from this array (Yay! bit-wize Shifts)

Sunday, April 29, 2012

Nav-Mesh Editor Part-2

So, as usual I have very little time to work; the time I am getting though, I am using to make sure I can better use my time.
Hence why I've spent more time on the nav-mesh editor.

Additions:

  • A translation tool (similar to most 3d editors).
  • Polygon highlighting.
  • Usability tweaks.

Anyways here are some pics to show what I'm talking about:

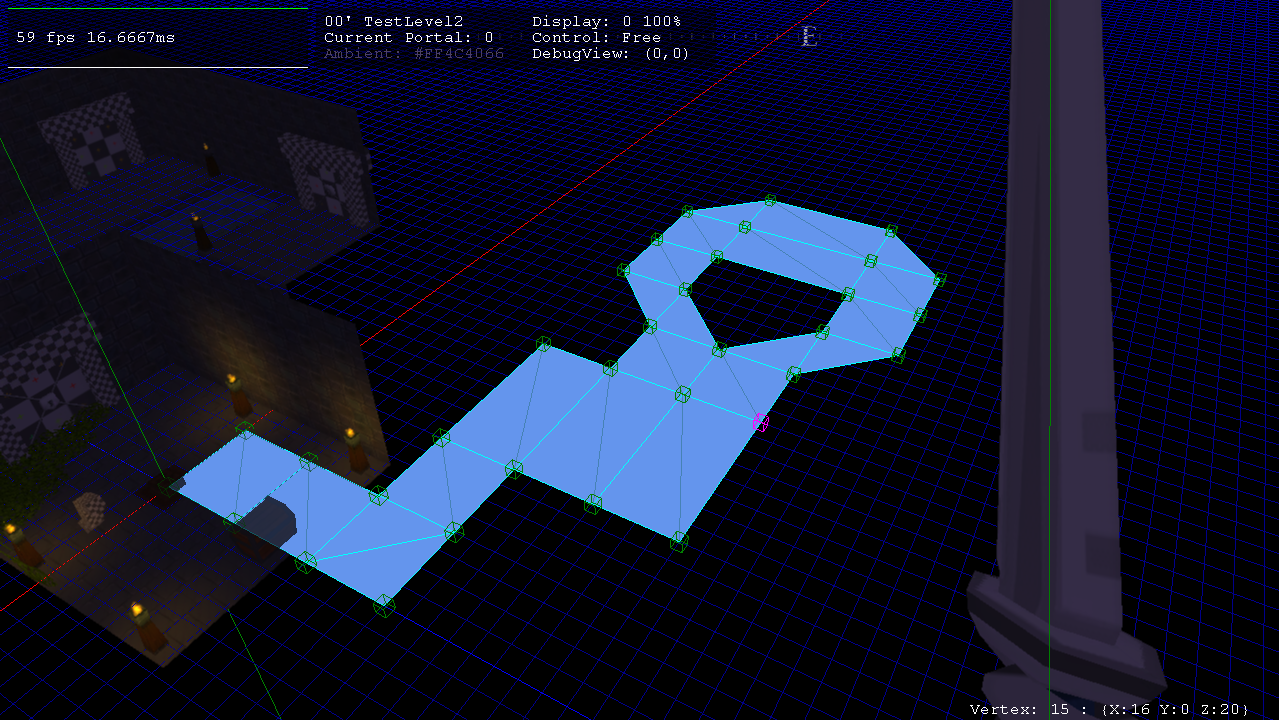
The navigation-mesh mesh editor.


Sunday, April 22, 2012

Nav-Mesh Editor

So as I mentioned in the previous post, making navigation meshes on pieces of paper is a pain. So I've created an editor that runs right within the game.
Don't worry, this won't show up while you're playing :)

Anyways, I can now make the nav-meshes much more easily, which should help speed up level creation!

What works:
  • Multi-selection of vertices
  • Keyboard based tranforms
  • Adding new vertices
  • The display of vertices (boxes)
  • The mesh visual, cyan outline of polygons

What's still missing:
  • Selecting polygons
  • Creating new polygons

So hopefully, when those last few features are added, I can create and test out a level that implements the navigation system...


Sunday, April 8, 2012

Sword Detection Progress

Making some awesome progress! I've gotten to the point where objects can be programmed to react when a weapon hits them. So things like monsters should be quite simple to make now. The "Hit-able" objects are represented with a bunch of spheres, inside of one big sphere. When the player swings a weapon, the engine does a ray-test to determine if the weapon hits the big sphere, and if so, checks to see if it hits one of the smaller spheres that make up a model.

In other words, you actually have to "hit" an object for the game to think you've hit something!

A smaller sphere in a test-torch

Hitting the torch, lights it!

A view of some of the collision bounds. Red = obstacle, Blue = big sphere check, Green = small sphere check

A better view of some "big-spheres"

Wednesday, April 4, 2012

First Person Progress

So tomorrow starts my spring-vacation, so I can hopefully get some serious work done!
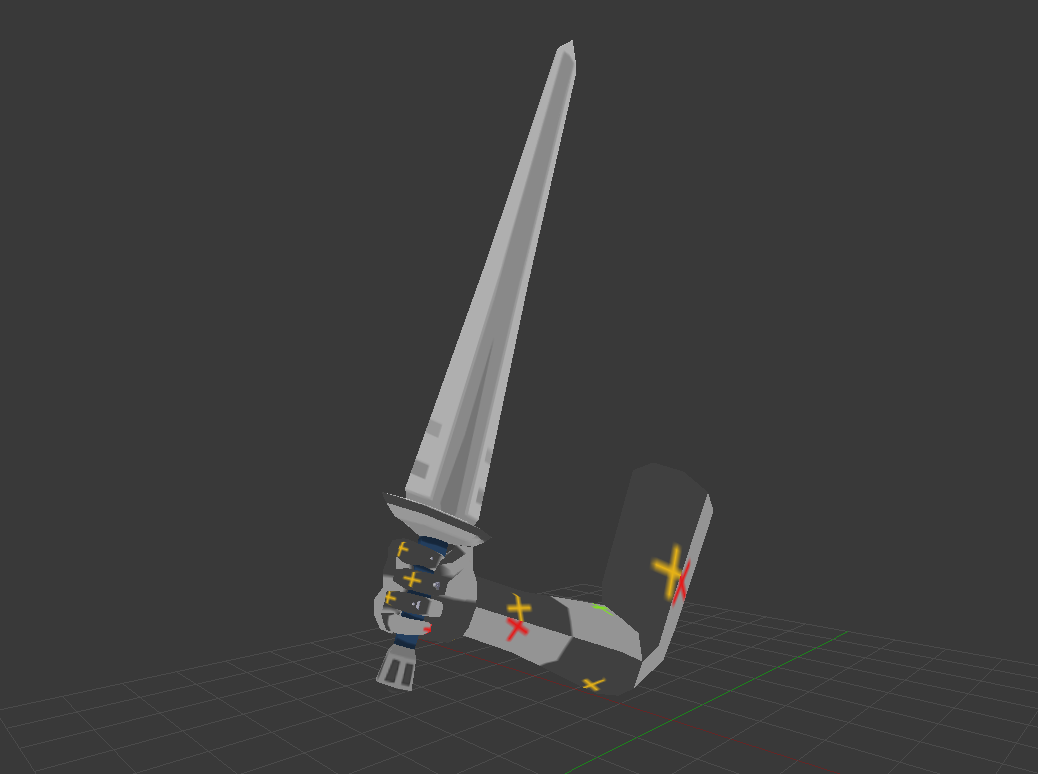
I have already started to make the "first person" models that will be used in the game. My plan is to use a stream-animation system to allow some dynamic movement of the characters arms. Currently, I have the right arm modeled and rigged, and making the left arm will be a flipped copy.
All that's left before getting it in the game are its textures and some animating.
Hopefully once I have the arms done, I can work on some of the awesome weapons I have planned!

The right arm holding a sword.

A view of the arm's rig.

Friday, March 30, 2012

New Game

For the past couple days, I've been focusing most of what little time I have towards the UI for Ruined.
As you can tell by the title, I've made some significant progress on the "New Game" screen.
Quite simply this is where the player will type in his or her name to create a new save game.

The New Game screen with no name entered;
The bottom right key is the backspace, I just have't made an icon for it yet.

My name :P
As you can see I went with a simple design; however the grey you see in the background is actually a transparent black. I still haven't decided what to draw / render in the background. Maybe some waving grass or an ocean or something... IDK
Anyways, on a lesser note, I also made some more button images - Yay Inkscape


Friday, March 23, 2012

User Interface, Saving

So another week has gone by, where I have been incredibly preoccupied with school and life in general.
Luckily I managed to get some more coding in :p
Things accomplished:

  • Saving and loading!
  • Multiple save games, up to 3.
  • The intro Ruined screen, has been implemented*
  • The screen to select a save game has also been implemented*
  • A "MessageBox" for handling, well messages.
Yes, I know "Press Start" is not centered, I still need to make an image for the start button.

An early version of the save manager, showing two saves games.
* Neither of these screens have backgrounds yet. Both saves in save manager pic -above- are for testing purposes: one puts the engine in debug mode, the other returns an error to simulate a broken save.

So yes, saving and loading has been implemented. Save files are created byte by byte and, as such, currently only take up 80 bytes! Of course this will change, but I don't see the save-file size growing to over 500 bytes.

A save-file contains:
  • Save File Version
  • Player name
  • Play time (days, hours, minutes)
  • Money!
  • Max health and current health
  • Max magic and current magic
  • Equipped items in right and left hand
  • The current level, and position
  • Flags! (these are where most of the player's progress is stored)
All of that data, sans flags is only 24 bytes! I store flags as single bits, so I can store 8 flags in one byte.
Currently save files are defined for only 256 flags, but that number can easily be expanded to the 2000 or so I'll probably need.

I also came up with a nifty save game manager. Quite simply, it allows for three unique save games, so three different people can have their own save.
Both the save game manger and the intro screen are in EARLY stages (they don't have backgrounds, music, some textures etc..)

Finally, the "MessageBox" displays messages like: 

Disconnecting the controller, results in this message.
Until next time!

Sunday, March 18, 2012

Player's House Part 2

Man, have I been busy lately. I've had barely any time to work on the game. Luckily I managed to sneak in some modeling this weekend. So here I have the model for the player's house -as you can tell by the post name. The model is mostly done.

Things that still need to be done:
  • Chimney
  • Windows
  • Base/Porch texture
  • Roof Texture 
Now for some pics (as seen in Blender):

The "solid" version.

Wireframe mode!

Textured version; the roof and porch are not using their final textures.
As I said, parts of the model are not using their correct textures, as I have yet to make them.
Hopefully I'll have this model done in the next day or two -school takes up a LOT of time- and can continue working.

As usual, all models are made in Blender and their respective textures are made in Inkscape.

Wednesday, March 14, 2012

Player's House Part 1

Okay, so I've decided now is the time to start making content for the actual levels of the game. Starting with the player's house.

Rough sketch of the player's house, done in pencil.
I should mention that I am using the amazing, opensource, 3d modeling tool Blender to make all of the 3d content and animation for Ruined. All of the textures and the UI are made in another awesome, opensource tool: Inkscape

Hopefully, I'll have the house finished soon, and can start focusing on the rest of the level.

Saturday, March 10, 2012

Need a screen recorder

Okay, it turns out that I need a good screen recorder to start showing off some of the dynamic things in the game - it's kind of hard to show animation in pictures.
So in the meantime, I guess I'll have to show off some of the things that don't need to be seen with their animated effects.

As I mentioned I have the item system mostly done. When an item is received it is shown, rotating on the screen like this:
A "Small Key" received from a chest.
Items can be received from anywhere: chests, people, stores containers...

Next we have a floor-switch. A floor-switch is a switch that is activated when jumped on. These switches have their own event handlers so they can be programmed to do anything!

A floor-switch, on the floor
If you look up in the top of this picture you'll see the compass, which was added to aid navigation to destinations and quests.

Hopefully when I find an free or open source screen recorder, I can start uploading videos of all of the cool components working.